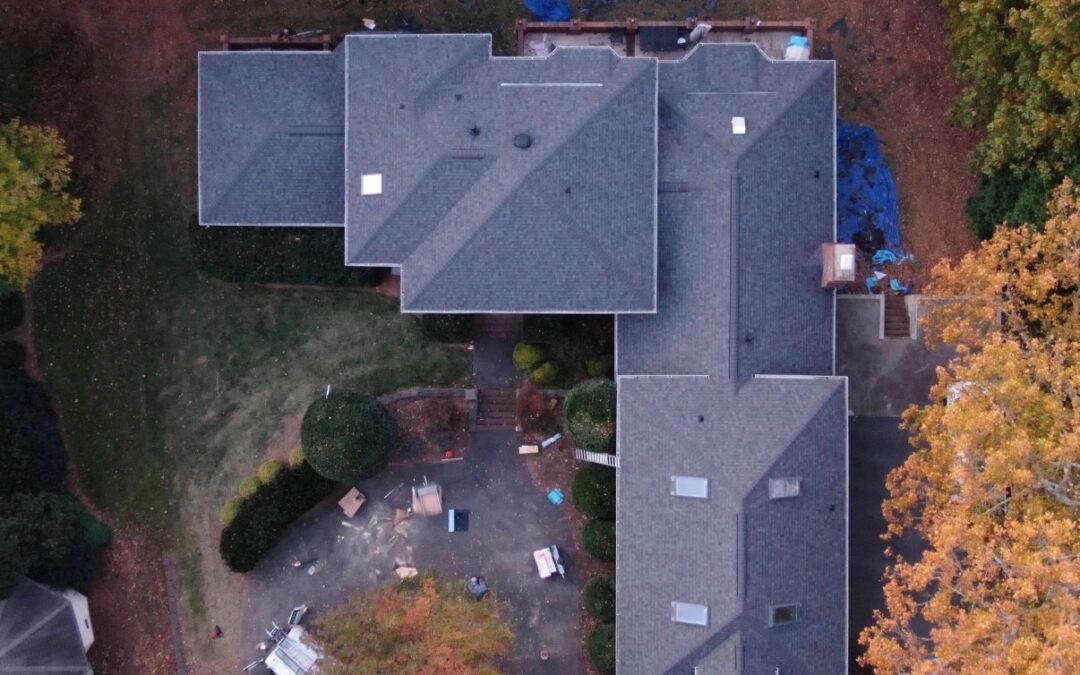
This pre-spring siding inspection checklist is a step-by-step spring home exterior inspection homeowners can use to find and fix water-management risks before storm season. In 40–60 minutes, you’ll scan roof-to-wall flashing, gutters, and cladding so small issues don’t become leaks, rot, or expensive repairs. The goal is simple: protect your home’s exterior and boost curb appeal, with extra attention on roof-to-wall flashing details.
Quick Answer: The 7-Step Exterior Scan
Use this quick guide to spot and fix the biggest water risks fast so your siding and roof edges are ready for spring storms.
- Walk and log: Walk the perimeter; note cracks, bulges, stains, and loose panels.
- Verify and photo: Verify roof-to-wall step and kickout flashing; look for gaps.
- Clean and test: Clean and test gutters/downspouts; extend discharge 4–6 ft (1.2–1.8 m).
- Confirm and measure: Confirm ground and roof clearances: 6 in (152 mm) and 1–2 in (25–51 mm).
- Check and reseal: Check windows, doors, and penetrations; repair failed sealant.
- Inspect and clear: Inspect soffits/fascia and attic vents for rot, blockages, and pests.
- Photograph and prioritize: Photograph issues; prioritize urgent water-management fixes first.
At-a-Glance Checklist
- Scan siding for cracks and warping.
- Confirm step flashing integrity.
- Install or verify kickout flashing.
- Clear gutters and test flow.
- Extend downspouts 4–6 ft (1.2–1.8 m).
- Maintain 6 in (152 mm) soil clearance.
- Seal joints with compatible caulk.
- Clean mildew with mild solution.
- Check soffit intake vents.
- Document and schedule repairs.
Download a printable checklist
This content was technically reviewed for accuracy and code alignment.
Tools and Prep
- Binoculars or zoom-capable smartphone camera
- Flashlight and optional moisture meter
- Putty knife or awl to probe soft wood
- Ladder, gloves, eye protection, and non-slip footwear
- Exterior-grade sealant/caulk (ASTM C920), touch-up paint, cleaning supplies
- Disposable drop cloths and masking supplies for safe prep around painted and EIFS areas
- Notebook or inspection app for photos and notes
Follow the 1:4 ladder rule: set the ladder base 1 foot out for every 4 feet of height, and secure it on solid, level ground. Wear PPE, maintain three points of contact, and never overreach. Avoid metal ladders near electrical service drops.
Step-by-Step: Your Pre-Spring Siding Inspection
1) Start With the Big Picture
Walk the home from 10–50 feet away and scan for patterns: uneven fading, algae streaks, or consistent runoff trails below roof valleys and gutters. Patterns reveal chronic water paths that demand attention before spring storms. Note any landscaping features that redirect water toward walls and consider grading improvements as needed.
2) Roof-to-Wall Intersections
Step flashings are individual L-shaped metal pieces layered shingle-by-shingle to divert water at roof-to-wall joints. Kickout flashing is the end piece that “kicks” roof runoff out and into the gutter, preventing water from running behind siding. If you see swelling, stains, or soft sheathing below these areas, prioritize repair and reference resilience best practices like IBHS FORTIFIED (IBHS FORTIFIED). For code alignment on flashing and weather-resistive barriers, see IRC R703 (IRC R703 summary). As a practical guideline, specify kickout flashings with a 2–4 in (51–102 mm) projection into the gutter at an angle around 110–120 degrees, and match the profile to the gutter to prevent splashback.
3) Gutters, Downspouts, and Drip Edge
- Clear debris and run a hose test to confirm tight joints and proper slope.
- Size downspouts to handle roof area (see calculation below).
- Extend downspouts 4–6 ft (1.2–1.8 m) from the foundation so lower siding doesn’t stay wet.
- Check that the drip edge sends water into gutters, not behind fascia or into soffits.
After verifying slope, seal and screw downspout outlets and miters to reduce joint leaks. In high-rainfall areas, consider upsizing to 3×4 in (76×102 mm) downspouts for greater capacity and improved debris tolerance.
4) Bottom Courses and Ground/Roof Clearances
Keep siding at least 6 inches (152 mm) above soil or mulch and 1–2 inches (25–51 mm) from roofing surfaces to avoid capillary wicking and rot. Avoid mulch or soil piled against siding; use edging or gravel breaks to reduce splashback and insect pressure. Confirm that drip lines from roof edges aren’t eroding soil and splashing debris onto lower courses.
5) Windows, Doors, and Penetrations
Inspect trim and sealant around windows, doors, lights, vents, hose bibs, and electrical boxes. Use compatible, exterior-grade sealant (ASTM C920) suited to your siding material and climate. Do not seal window or cladding weep holes; they are intended drainage paths.
Pro tip: Do not seal over stucco control joints or vinyl window weeps—these allow for movement and drainage and must remain open.
Material-specific tips: For vinyl, seal trim-to-trim joints but not panel laps. For fiber cement and engineered wood, seal trim interfaces and penetrations; don’t caulk butt joints—use joint flashing or approved flashing tape per manufacturer instructions (e.g., James Hardie). For wood, spot-prime bare areas before repainting after caulk cures.
6) Surface Condition: Stains, Mold, and Efflorescence
Clean vinyl siding with a mild detergent at roughly 1:10 dilution and a soft brush. Avoid pressure washing near seams and lap joints to prevent water intrusion behind panels. For fiber cement and wood, follow manufacturer cleaning guidance and repaint where coatings are compromised.
Mold vs algae vs dirt: Mold is often black with fuzzy growth in shaded, damp spots; algae tends green and filmy; dirt is brown/gray and wipes off dry. Start with gentle soap and water; spot-treat stubborn biological growth with manufacturer-approved cleaners. If stains recur quickly, investigate nearby sprinklers, splashback, and shaded, slow-drying areas for hidden moisture issues. If the manufacturer allows diluted bleach for biological stains, never mix bleach with ammonia, protect nearby plants, and always test an inconspicuous area first.
7) Fasteners, Seams, and Movement
- Vinyl panels must “float.” Leave 1/32–1/16 inch (0.8–1.6 mm) of play at fasteners and never face-nail through the panel field.
- Lap siding: Look for open joints, nails backing out, and missing joint flashing.
- Board-and-batten: Check for cupping battens and open vertical seams.
8) Soffits, Fascia, and Ventilation
Inspect soffit panels and fascia for rot, loose sections, and pest activity. Verify continuous soffit intake and balanced roof exhaust with a target net free area of 1:150, or 1:300 where allowed by local code or when a proper interior vapor retarder exists. Confirm baffles keep insulation from blocking soffit vents, and watch for active wasp or bird nests before working overhead.
9) Interior Spot Check
After winter storms, scan upper walls and ceilings along exterior walls for stains, bubbling paint, or musty odors. Use a low-cost hygrometer to monitor indoor humidity and check around bath fans and range hood penetrations for leaks. With a moisture meter, wood moisture content above 20% indicates elevated risk; recheck after 48 hours of drying.
10) Document and Prioritize Repairs
Photograph each defect, note location and size, and separate urgent water-management fixes (flashing, gutters, clearances) from cosmetic or routine maintenance (cleaning, touch-up paint). Urgent items should be scheduled before the first major spring storm system. Keep a simple spreadsheet of issues, estimated costs, and contractor notes to track progress.

What to Watch For by Siding Type
Different claddings fail differently. Use these targeted checks to tailor your spring home exterior inspection and prevent roof-to-wall flashing and moisture problems from escalating.
Vinyl Siding
- Not a water barrier: vinyl is a cladding that sheds most rain; it relies on the weather-resistive barrier (WRB) behind it to drain incidental water via a continuous drainage plane.
- Common issues: impact cracks (hail), buckling from tight nails, chalking/fade.
- Failure signs: wavy courses on hot days, stains below roof-to-wall joints, loose starter strips.
- Typical lifespan: 20–40 years depending on quality, UV exposure, and maintenance.
- DIY: replace isolated panels; clean with mild solution and soft brush.
- Pro: widespread buckling, missing starter, water behind panels near flashing.
For best results with vinyl siding cleaning, follow manufacturer-safe detergents, soft-bristle brushes, and low-pressure rinsing; see the Vinyl Siding Institute cleaning guide.
Fiber Cement (e.g., James Hardie)
- Common issues: paint failure, open joints, moisture stains at butt joints if joint flashing is missing.
- Failure signs: edge swelling, delamination, and staining at vertical joints.
- Guidance: do not caulk butt joints; use joint flashing or approved flashing tape per manufacturer instructions (James Hardie Care & Maintenance).
- Typical lifespan: 30–50+ years with proper coatings and details.
- DIY: low-pressure cleaning; spot paint per manufacturer specs.
- Pro: joint flashing retrofits, widespread moisture staining, or structural rot.
Plan your fiber cement maintenance around repaint intervals (often 8–15 years) and verify joint flashing at all butt joints to prevent capillary staining and moisture intrusion. Most brands offer factory-finish touch-up kits; keep all cut edges primed and painted as part of fiber cement maintenance. For older “cement board” sidings, test for asbestos before cutting or drilling and hire licensed abatement if asbestos is present.
Wood Siding (Cedar, Pine)
- Common issues: rot at lower courses, peeling paint, insect or woodpecker damage.
- Failure signs: spongy boards near grade, cupping, and dark moisture staining.
- Typical lifespan: 20–40 years with diligent coatings and 6-in (152 mm) clearance.
- DIY: replace isolated boards, scrape/prime/repaint, maintain vegetation clearance.
- Pro: structural rot, flashing errors, or extensive clapboard replacement.
Decide on wood siding rot repair based on damage extent: replace fully decayed boards and consider scarf repairs for limited edge rot after drying, priming, and back-priming for durability. For homes built before 1978, follow EPA RRP lead-safe practices and use containment and HEPA cleanup when sanding or scraping painted surfaces. For longevity, use stainless steel or hot‑dip galvanized fasteners, seal end grains, and back-prime replacement boards before installation.
Stucco/EIFS
- Common issues: cracks at openings, staining from gutter leaks, trapped moisture when kickouts are missing.
- Failure signs: bulging, soft spots, high moisture readings, or efflorescence (white powder).
- Typical lifespan: 50+ years for traditional stucco with proper drainage; EIFS requires vigilant detailing.
- DIY: seal hairline cracks with elastomeric products; improve drainage and splash control.
- Pro: soft/bulging areas, flashing defects, or persistent high moisture levels.
To diagnose EIFS moisture problems, hire a qualified pro to perform moisture probing and infrared scanning where appropriate, then correct drainage and flashing details before repairing the finish. Maintain weep screed clearances: 4 in (102 mm) above soil and 2 in (51 mm) above paved surfaces, and never block weep screeds with stucco, mulch, or patios.
Regional Considerations
- Cold climates: Watch for freeze–thaw cracks, ice dam staining at roof-to-wall intersections, and trapped snow against lower courses. Improve attic ventilation and air sealing to minimize ice dams. Consider installing heat cables at chronic damming points and verify kickouts are present where valleys terminate into walls.
- Hot–humid regions: Expect aggressive UV fading, algae growth on shaded facades, and daily thermal movement. Favor light colors, regular cleaning, and verified drainage planes. Ensure landscaping sprinklers don’t wet walls and add wider overhangs or gutters where splashback persists.
- Coastal zones: Guard against salt corrosion, wind‑borne rain, and uplift. Stainless fasteners, taped WRBs, and robust kickout flashing are critical. Periodically rinse salt-laden facades with fresh water and check sealants more frequently due to UV and salt exposure.
In wildfire-prone areas, evaluate noncombustible claddings (like fiber cement) and maintain defensible space. In high-precipitation regions, consider drainable housewraps and ventilated rainscreens to keep sheathing dry during multi-day storms. On metal roofs above walls where sliding snow has damaged siding, add snow guards or diverters to protect cladding and flashing. Also redirect HVAC condensate lines and irrigation so discharge does not wet siding or foundations.
Siding Comparison Table
| Siding | Maintenance Interval | Common Failures | Basic Cleaning |
|---|---|---|---|
| Vinyl | Annual wash; inspect fasteners each spring | Buckling, impact cracks, loose starter | 1:10 mild detergent, soft brush |
| Fiber cement | Repaint 8–15 years; inspect joints annually | Open joints, missing joint flashing, coating failure | Gentle rinse, follow manufacturer guidance |
| Wood | Recoat 3–7 years; inspect spring/fall | Rot, peeling paint, insect damage | Gentle wash, avoid saturating wood |
| Stucco/EIFS | Annual crack check; repaint 7–10 years | Cracks, trapped moisture, efflorescence | Low-pressure rinse, approved cleaners |
Case Study: Missing Kickout Flashing
Problem: A homeowner noticed peeling paint and bulging fiber cement below a roof-to-wall junction. Interior drywall showed a faint stain after heavy rain.
Diagnostic steps: Exterior inspection revealed no kickout flashing and overflow marks on the adjacent siding. Moisture probing at the lower course found elevated readings, and a small test cut confirmed wet sheathing.
Fix: Install kickout flashing, re‑flash the roof-to-wall step flashing, replace damaged sheathing/WRB, install joint flashing at butt joints, patch siding, and repaint. Post-repair hose testing confirmed proper water diversion into the gutter.
Water Is the Enemy: Follow the Flow
- Rain hits the roof; shingles shed most water.
- Step flashing channels runoff along the wall.
- Kickout flashing diverts flow into the gutter.
- Gutters carry water to downspouts.
- Downspouts discharge 4–6 ft (1.2–1.8 m) away.
- WRB behind siding drains incidental water downward.
- Drip edge prevents backflow behind fascia and into soffits.
- Grade slopes water away from the foundation.
Failures usually occur at the end of roof-to-wall runs (missing kickouts), at clogged or undersized gutters, and where siding is too close to grade. Wind-driven rain can overwhelm undersized downspouts, and splashback at hardscapes keeps bottom courses wet. Add splash blocks or diverters where hardscape causes bounce-back, and use gravel beds to break droplet energy and reduce staining.
For best results, place splash blocks at least 2–3 ft (0.6–0.9 m) long and install gravel beds 2–3 in (50–75 mm) deep beneath drip lines to dissipate impact and speed drying.
Common Mistakes to Avoid
- Sealing window or cladding weep holes.
- Pressure washing directly into laps or seams.
- Caulking fiber cement butt joints instead of adding joint flashing.
- Allowing siding to touch soil or mulch.
- Ignoring downspout discharge and splashback.
- Over-driving nails that prevent vinyl from floating.
Repairs: What’s DIY vs Pro? Costs and Timing
- DIY-ready: Cleaning, minor caulk/paint touch-ups, single-panel vinyl swaps, downspout extensions, vegetation trimming.
- Call a pro: Missing kickout or step flashing, repeated leaks, structural rot, widespread buckling, storm/hail claims, or unsafe access.
Typical costs (vary by region): Kickout flashing install $250–$600 per location; minor vinyl panel replacement $150–$300; small gutter repairs $150–$400; localized rot remediation often $800+ depending on scope. Get multiple quotes and ask for photos of hidden conditions.
Scheduling tip: Book inspections before the first major spring storm system in your area to secure faster turnaround.
Insurance and Documentation Tips
- Capture date-stamped photos and a brief description for each defect.
- Save a reputable weather report for the event date if hail or wind is suspected.
- Request a pre-claim inspection from a qualified contractor to define scope.
Preventive Maintenance Schedule
- Every spring: full siding and roof-edge inspection; clean gutters; test downspout flow; touch up caulk/paint; wash siding.
- Every fall: re-check roof-to-wall intersections and lower courses; clear leaves from gutters/valleys; verify attic intake/exhaust.
- After severe weather: photo walk-around; check for new cracks, dents, or displaced panels.
- Monthly during heavy pollen or leaf drop: quick rinse of facades and a gutter glance.
- Annual: service dryer and bath fan vents to prevent lint stains and moisture buildup.
Analogy: Your Home’s Raincoat
Your home is a layered raincoat. The roof sheds most water; the siding blocks wind‑driven rain; the flashings are the zippers and seams keeping water out. A tiny “zipper” like kickout flashing prevents a small gap from becoming a catastrophic leak during a storm.
Energy and IAQ Benefits
Better exterior water management reduces indoor humidity loads, helping HVAC run efficiently while discouraging mold. Sealing gaps around penetrations and fixing wet sheathing improve comfort and air quality. See the U.S. Department of Energy’s guidance on air sealing and moisture control (DOE Energy Saver).
Future Outlook
- More severe wind-driven rain and hail in many regions will stress roof-to-wall details and siding durability.
- Resilience standards like FORTIFIED will push better flashing, sealed roof decks, and documented drainage planes.
- Expect wider adoption of drainable housewraps and ventilated rainscreens in new construction and retrofits.
- Insurers are increasingly incentivizing resilient details (e.g., kickouts, sealed decks) with lower premiums or credits.
Short Glossary
- WRB/housewrap: Weather-resistive barrier behind cladding that drains incidental water.
- Drip edge: Metal flashing at roof edges that directs water into gutters.
- Soffit: The underside of roof overhangs, often vented for attic intake.
- Fascia: Vertical trim board at the roof edge supporting the gutter.
- Efflorescence: White, powdery salts on masonry or fiber cement indicating moisture movement.
- Kickout flashing: Angled flashing at the end of roof-to-wall intersections that directs water into gutters.

FAQs
Do I need housewrap behind vinyl siding?
Yes—vinyl is not a water barrier; a continuous WRB and flashing integration per IRC R703 provide the drainage plane.
What is kickout flashing and do I need it?
Yes—kickout flashing is required at roof-to-wall terminations to divert water into the gutter and keep it off your siding. Without it, runoff can travel behind cladding, soaking sheathing and framing and causing hidden rot.
How do I fix buckled vinyl siding?
Loosen, don’t tighten—vinyl must float on its fasteners to move with temperature changes. Gently unlock affected panels, reset nails to allow 1/32–1/16 inch of play, and re-lock; replace heat-warped panels if they won’t lie flat.
Is efflorescence on siding dangerous or just cosmetic?
Mostly cosmetic, but it signals moisture movement that you should address. Improve drainage, check flashing and gutters, and clean with manufacturer-approved methods to prevent recurrence.
How do I know if water is getting behind my siding?
Look for soft trim, bulging panels, or stains near roof-to-wall joints. Interior ceiling or wall discoloration after storms is another warning sign that warrants a professional inspection.
Should I pressure wash my siding?
Usually no—high pressure can drive water into seams and behind laps. Use a low-pressure rinse with a mild detergent and soft brush, following your siding manufacturer’s instructions.
When should I call a roofing and siding contractor?
Call when you see flashing defects, repeated leaks, structural rot, or unsafe access. Pros can diagnose the full water path—from roof to wall to ground—and provide durable repairs.
How long does a siding inspection take?
Most homes take 40–60 minutes for a thorough exterior scan, plus extra time for photos and notes. Add 10–15 minutes if you test gutters with a hose or inspect second-story areas.
What time of day is best to inspect siding?
Inspect mid-morning for good light and fewer shadows, then recheck problem areas after rain to spot fresh leaks or staining paths.
Sources and Further Reading
Concepts in this guide align with International Residential Code (IRC) R703 for weather-resistive barriers and flashing integration.
- Vinyl Siding Institute: How to Clean Vinyl Siding
- James Hardie: Care & Maintenance
- Insurance Institute for Business & Home Safety (IBHS): FORTIFIED
- U.S. Department of Energy: Air Sealing Your Home
- International Residential Code (IRC) R703: Wall Covering and WRB (summary)
Ready to Protect Your Home?
Book a professional roof-to-wall inspection to prevent leaks before spring storms. Our specialists verify kickout flashing, WRB continuity, and drainage so your siding performs. Schedule online now and get your FREE estimate.
Summary: Tackle the big three before spring: verify roof-to-wall flashing (especially kickouts), ensure clean gutters/downspouts with proper discharge, and maintain 6-inch (152 mm) ground clearance. These steps stop water intrusion, prevent costly repairs, and keep your home looking its best.